Most people shopping for an electric bike commuter setup start with the wrong number. They want top speed, peak watts, or the range printed on the box. I have spent 15 years as a bike mechanic in Austin and 7 of those years commuting on electric bikes, and the number that decides whether you are still riding in month six is none of those.
The setup is not the bike. It is the bike, plus the route, plus the charging routine, plus the plan for the days you cannot ride it. Get those four right and a modest bike will carry you for years. Get them wrong and an expensive bike will sit in the garage with a flat battery and a seized chain.
This is the checklist I walk customers through before they spend anything, and the two platforms I point them at depending on the commute they actually have.
Why you should trust me
I have been turning wrenches for 15 years, and the last 7 of those I commuted on bikes I built or maintained myself. I keep a logbook of which motors fail and at roughly what mileage, and I have built more conversions than most shops will see in a decade. Started writing about e-bikes because too many customers bought cheap ones that died inside a year, and I got tired of being the guy who delivered the news.
When I review a bike I ride it the same way every time: a 50 mile mixed terrain loop, a range run at three assist levels, and a battery health check at 500 miles. I do not publish a range number I have not measured, and I do not call any battery fireproof, because batteries are chemistry, not marketing.
What that means for you is simple. The advice below is about what to check and what to skip. A spec sheet is not a commute.
How I judge a commuter setup
Six things decide whether a bike is a tool or a toy. I run all six before I recommend anything.
The battery. This is the heart of the bike and the part most likely to hurt you. Ask for the electrical system certification, usually UL 2849 for a complete e-bike. An uncertified pack is a fire risk and a money pit, and no discount is worth it. Confirm the pack is replaceable, that the charger is a standard part you can buy again, and what the warranty actually covers.
The brakes. An e-bike goes 28 mph. At that speed the brakes need to stop 60 pounds of bike and rider, plus a loaded bag, plus a lock. Mechanical disc brakes are the floor. Hydraulic disc brakes are better. Rim brakes on a heavy e-bike are a no, and I do not care how the marketing reads.
The range claim. Range numbers are tested light, flat, and at low assist. Real range is a function of your weight, your terrain, and the assist level you actually use. A claimed 80 miles is a best case, not a promise. Plan your commute around 60 percent of whatever the box says and you will rarely be stranded.
The motor. A hub motor lives in the wheel. It is cheaper, simpler, and fine for flat cities. A mid-drive motor sits at the pedals and uses the bike's gears, which is what you want if your route has real hills. Neither is wrong. Buying the wrong one for your terrain is.
Parts and service. Standard wheel sizes, standard brake pads, a charger you can replace, a battery you can buy in two years. If the only source for a wear part is the original seller, that is a countdown clock.
Where it sleeps. Weight and folded size matter more than almost anything on this list if you live on a third floor or park in a shared garage with no outlet.
Two platforms, two different commutes
There are two ways to put a bike into a commute, and they solve different problems. Neither is a compromise version of the other.
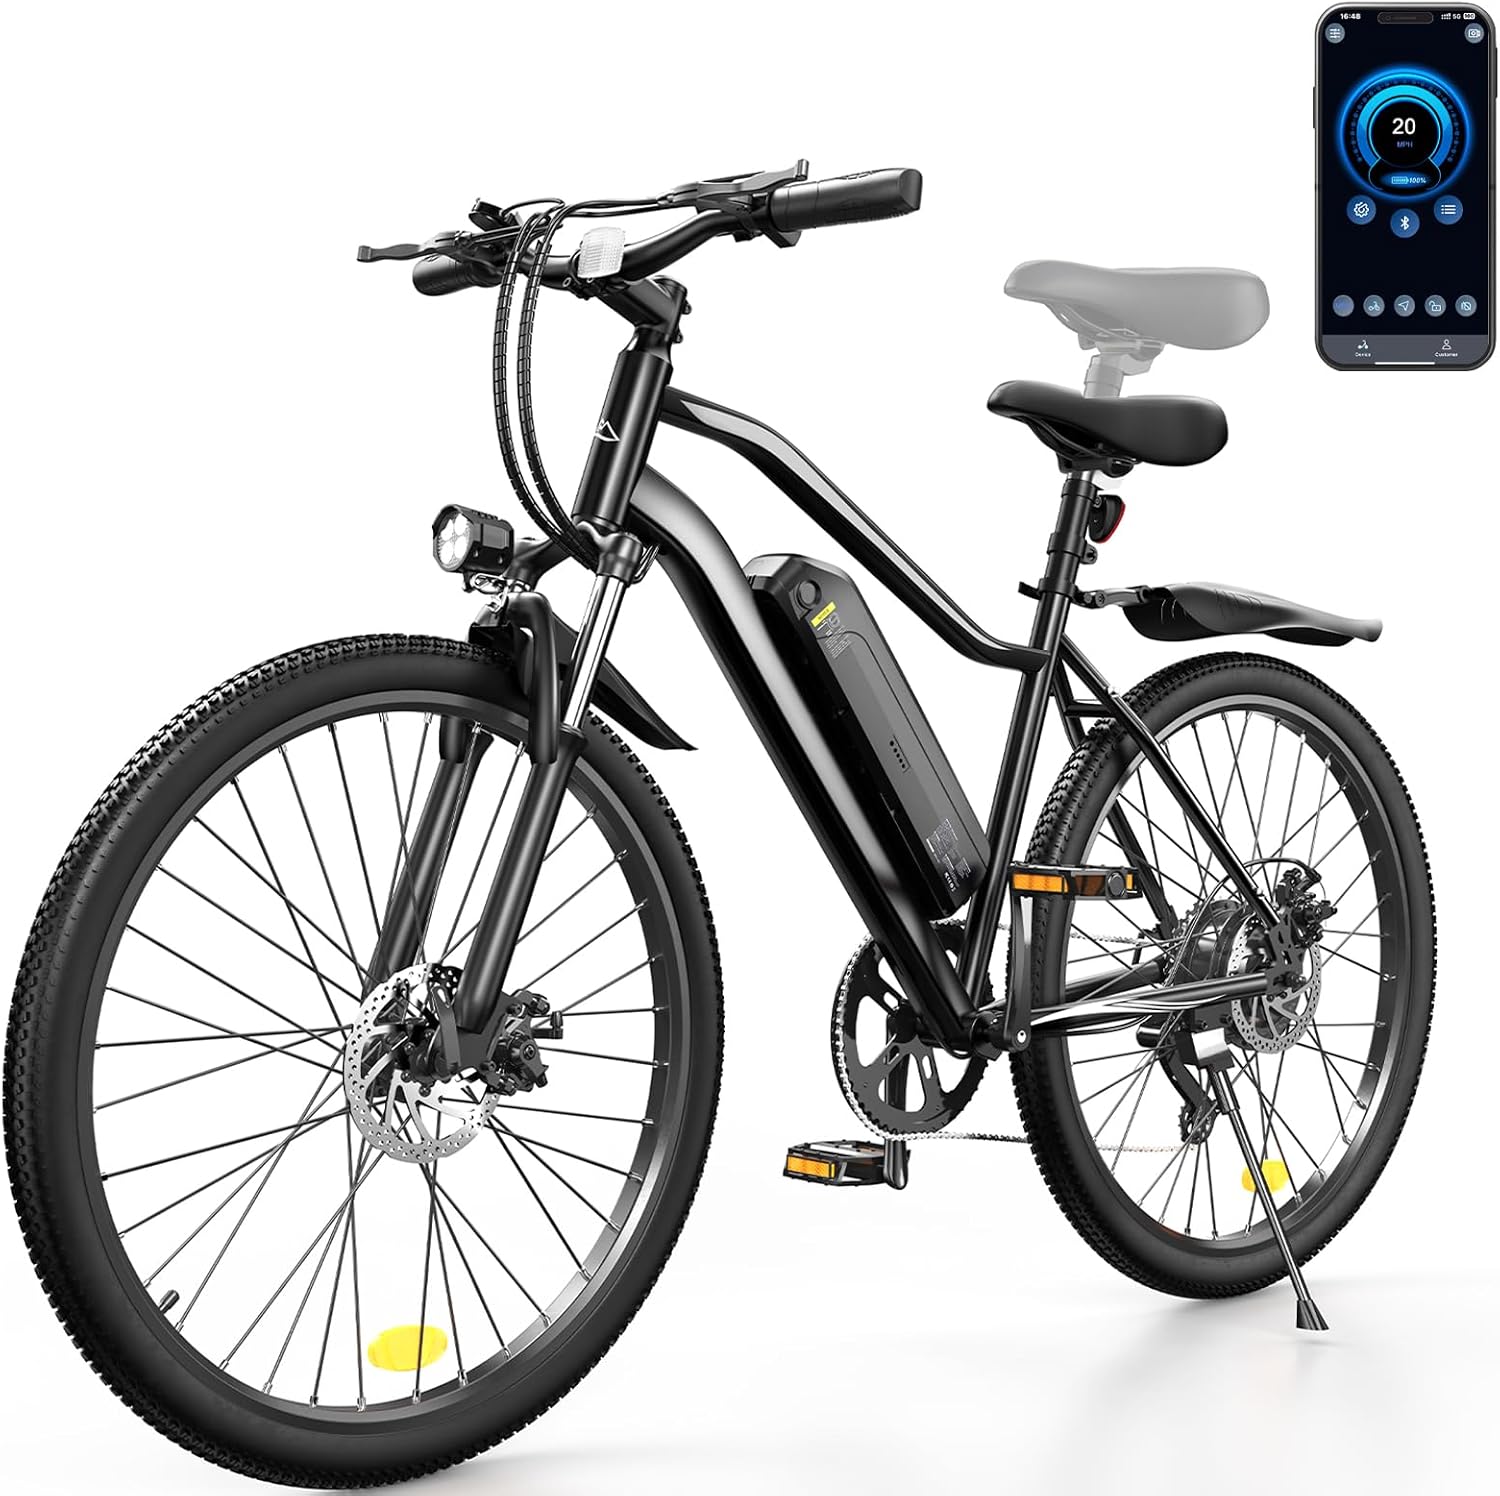
The e-bike pick: Electric Bike 26" Tire with 1500W Peak Motor, Up to 80 Miles Range
 Visit on Amazon →
This is the full size option: 26 inch wheels, a motor rated at 1500W peak, and a claimed range of up to 80 miles. Read the motor number the way a mechanic reads it. Peak watts are the number marketing uses, and the continuous rating plus the controller is what you actually ride. 26 inch wheels matter for a boring reason that becomes important at 7 a.m. on a Tuesday: tires, tubes, and wheels in that size are everywhere, so a flat is a 20 minute problem instead of a week long order.
The 80 mile figure is the one to hold loosely. That number assumes a light rider, flat ground, and the lowest assist level. If you weigh more, climb anything, or ride at full assist because you want to arrive without sweating, expect meaningfully less. That is not a knock on the bike. It is how every range claim in this category works.
Before you buy, ask the seller for the electrical system certification and confirm the pack is removable. A removable battery changes your life if you park somewhere without an outlet, and it changes your risk if you park somewhere with one. Check the brake type, since this class of bike is heavy and heavy plus fast needs good stoppers. Check current Amazon price before you commit, because stock and configuration shift.
Flaws but not dealbreakers: This is a full size bike, so it is not going on a train rack or into a closet. If you need the bike to disappear, keep reading.
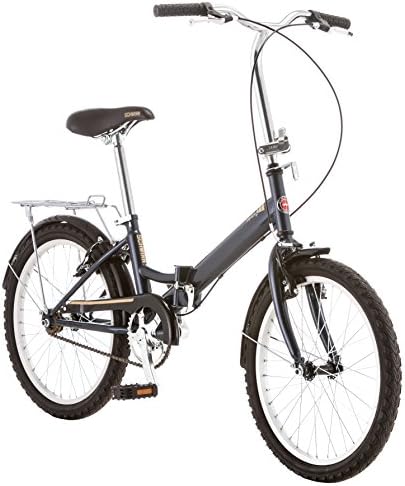
The folding bike pick: Schwinn Hinge Adult Folding Bike, 20-inch Wheels, Rear Carry Rack, Carrying Bag, Multiple Colors
 Visit on Amazon →
This is the other half of the problem. A folder solves storage and transit, not distance. It has 20 inch wheels, a rear carry rack, and a carrying bag in the box. That combination is built for the commute that looks like this: ride to the station, fold, board, unfold, ride the last mile, fold again, park it under a desk.
It is not electric, and that is a feature or a bug depending on your route. You get the exercise and you pay for it on hills. If your commute has a long climb at either end, a folder plus a train is a worse plan than an e-bike, and I will tell you that to your face.
The 20 inch wheels are the tradeoff. They are nimble in traffic and twitchy on rough pavement, so pick your line and keep your hands on the bars. The hinge is the part that fails first on any folder, so check it for play when it arrives, keep it clean, and grease it on a schedule. The included bag is a storage and short carry bag, not a padded flight case. And check your transit agency's rules before you plan around it, because folded dimensions and peak hour restrictions are set locally, not nationally.
Check current Amazon price before you buy, and confirm the color and configuration you want.
Flaws but not dealbreakers: Folding and unfolding takes practice. Do it ten times in your living room before you do it on a platform with 40 people watching.
The setup workflow, step by step
Now the part you came for. This works whether you buy an e-bike, a folder, or both.
Step one: measure the real commute. One way distance, total elevation, where you park, whether there is an outlet, and whether transit is part of the trip. Measure the commute you have, not the one you wish you had.
Step two: pick the platform before the model. Folding plus transit beats an e-bike you cannot store. An e-bike beats a folder if your distance is long and your hills are real.
Step three: verify the battery first. Certification, voltage, replaceability, warranty. This is the single most important check on the list, and it is the one buyers skip because it is boring.
Step four: confirm the brakes. Disc brakes, working, with pads that have life left. If the bike arrives with the levers pulling to the bar, fix that before your first ride, not after.
Step five: set the fit. Saddle height so your knee is nearly straight at the bottom of the pedal stroke. Reach so your elbows are not locked. On a folder, re-check the bar and stem clamps every few rides, because folders vibrate loose faster than rigid frames.
Step six: set tire pressure for the load. Under-inflated tires on a heavy bike cause pinch flats and vague steering. Check pressure weekly, not monthly.
Step seven: bed the brakes in. Empty parking lot, ten firm stops from a moderate speed. Pads that have not been bedded grab unevenly, and uneven brakes on a 28 mph bike are a problem.
Step eight: build a charging routine. Charge to full before a long ride. For daily use, store the pack somewhere in the middle of its range rather than at 100 percent all week. Never charge a pack that is hot from a ride or cold from a winter porch. Charge it where you can see it, ideally not in a garage directly under a bedroom. I will not use the word fireproof about any battery, because chemistry does not care about adjectives.
Step nine: lock it properly. Two locks. One through the frame and rear wheel to a fixed object, one through the front wheel. If the battery is removable, take it with you. A locked bike with an unlocked battery is a bike with a countdown clock.
Step ten: plan the bad day. Spare tube, tire levers, a multi tool, and a way home that does not involve a 4 mile walk. This is the difference between an inconvenience and the day you stop commuting.
The 500 mile battery health check
Battery health is how much capacity the pack actually holds after use, and it is the spec that matters more than any number on the box. Here is how I check it without special equipment.
In your first week, note the range you get on your regular commute at your usual assist level. Write it down. At 500 miles, do the same ride under similar conditions and compare. A small drop is normal. A large drop means the pack is degrading faster than it should, and you want that documented while the warranty is still live.
Keep a simple log. Charge cycles, rough temperatures, and the range you saw. If the pack stops holding a charge, stop using it, get it out of the house, and take it to a recycler. Do not leave a swollen pack on a shelf hoping it recovers.
What the setup actually costs
The bike is the visible purchase and the smallest part of the long run budget. Plan for a lock that costs more than you want to spend, front and rear lights, a spare charger, tires and brake pads, and one professional tune in the first year. None of it is glamorous. All of it is what separates a bike that gets ridden from a bike that gets parked.
Mistakes that end commutes early
Buying range instead of brakes. Charging in a freezing garage. Skipping the second lock. Buying a battery with no certification because the price was good. Ignoring the fit and blaming the bike for a sore knee. Having no rain plan. Every one of those is fixable, and every one of them is cheaper to fix before you buy than after.
The bottom line
Pick the platform for your actual commute, verify the battery and the brakes before anything else, and build a charging and locking routine you will follow on a bad day. Do that and the bike becomes invisible, which is the highest compliment a commuter can pay it. You do not need a four thousand dollar e-bike. You need a good battery, good brakes, and a plan for Tuesday.