Most e-bike problems that land in my stand are not motor problems. They are setup problems. A stem bolt that never got torqued. Brake pads that were never bedded in. A battery that lives at 100 percent in a hot garage. A rider who picked an assist level by feel and never measured what it costs in range. Get the commuter e-bike setup right on day one and the bike disappears underneath you, which is the whole point of commuting on one.
I have been a bike mechanic for 15 years and an e-bike commuter for 7 of them, here in Austin, where the hills are short, steep, and constant and the summer heat is genuinely hard on lithium packs. I keep a logbook of motor failures and battery health readings, mostly because I got tired of watching customers buy a bike, ride it for eight months, and discover the pack had quietly lost a third of its capacity.
This is the workflow I run on any commuter e-bike, in the order I give it to customers: safety first, fit second, assist levels and range last. The two bikes below are the ones I use to walk through it, one full-size and one folding, and both sit in the budget tier where setup discipline matters most.
Why you should trust me
Fifteen years in the stand, seven of them with a battery under my own feet, and more conversions than most shops will ever see. I do not review a bike until it has at least 100 miles on it, and every one gets the same three checks: a 50-mile mixed-terrain ride, a range test at three assist levels, and a battery health reading at the 500-mile mark.
I also do not use the word fireproof about anything. Batteries are chemistry, not marketing, and the difference between a good pack and a bad one is a certification sticker and a cell supplier, not a slogan. That is the standard I hold these two bikes to.
How I evaluate a commuter e-bike
Four checks, in this order, because the order matters. A beautiful drivetrain does not help you if the pack is uncertified.
One, the battery. Is the pack and charger listed by a recognized safety lab? Is the pack removable so you can charge it indoors and off the bike? Is the capacity honest for the price? The battery is the heart of the machine. Everything else is cosmetic.
Two, the brakes. An e-bike is heavier than a regular bike and it goes faster, and both of those facts land on the brake pads. I want mechanical disc brakes at minimum, properly bedded in, with levers that reach a full squeeze without hitting the bar. Non-negotiable.
Three, real range. Range numbers on a box are tested light, on flat ground, at the lowest assist level. Real range depends on your weight, your terrain, and your assist level. I test all three and trust none of the printed numbers.
Four, standard parts. Hub motors are fine for flat cities and cheap to live with. Mid-drives are better on hills because they use the bike's gears. Either way, I want a motor, a controller, and a battery I can replace in three years without importing anything.
The two bikes this workflow fits
These are not the only two commuter e-bikes in the budget tier, but they cover the two shapes most people are actually deciding between: a full-size 26-inch bike and a folding mini bike. The setup steps are the same. The emphasis is not.
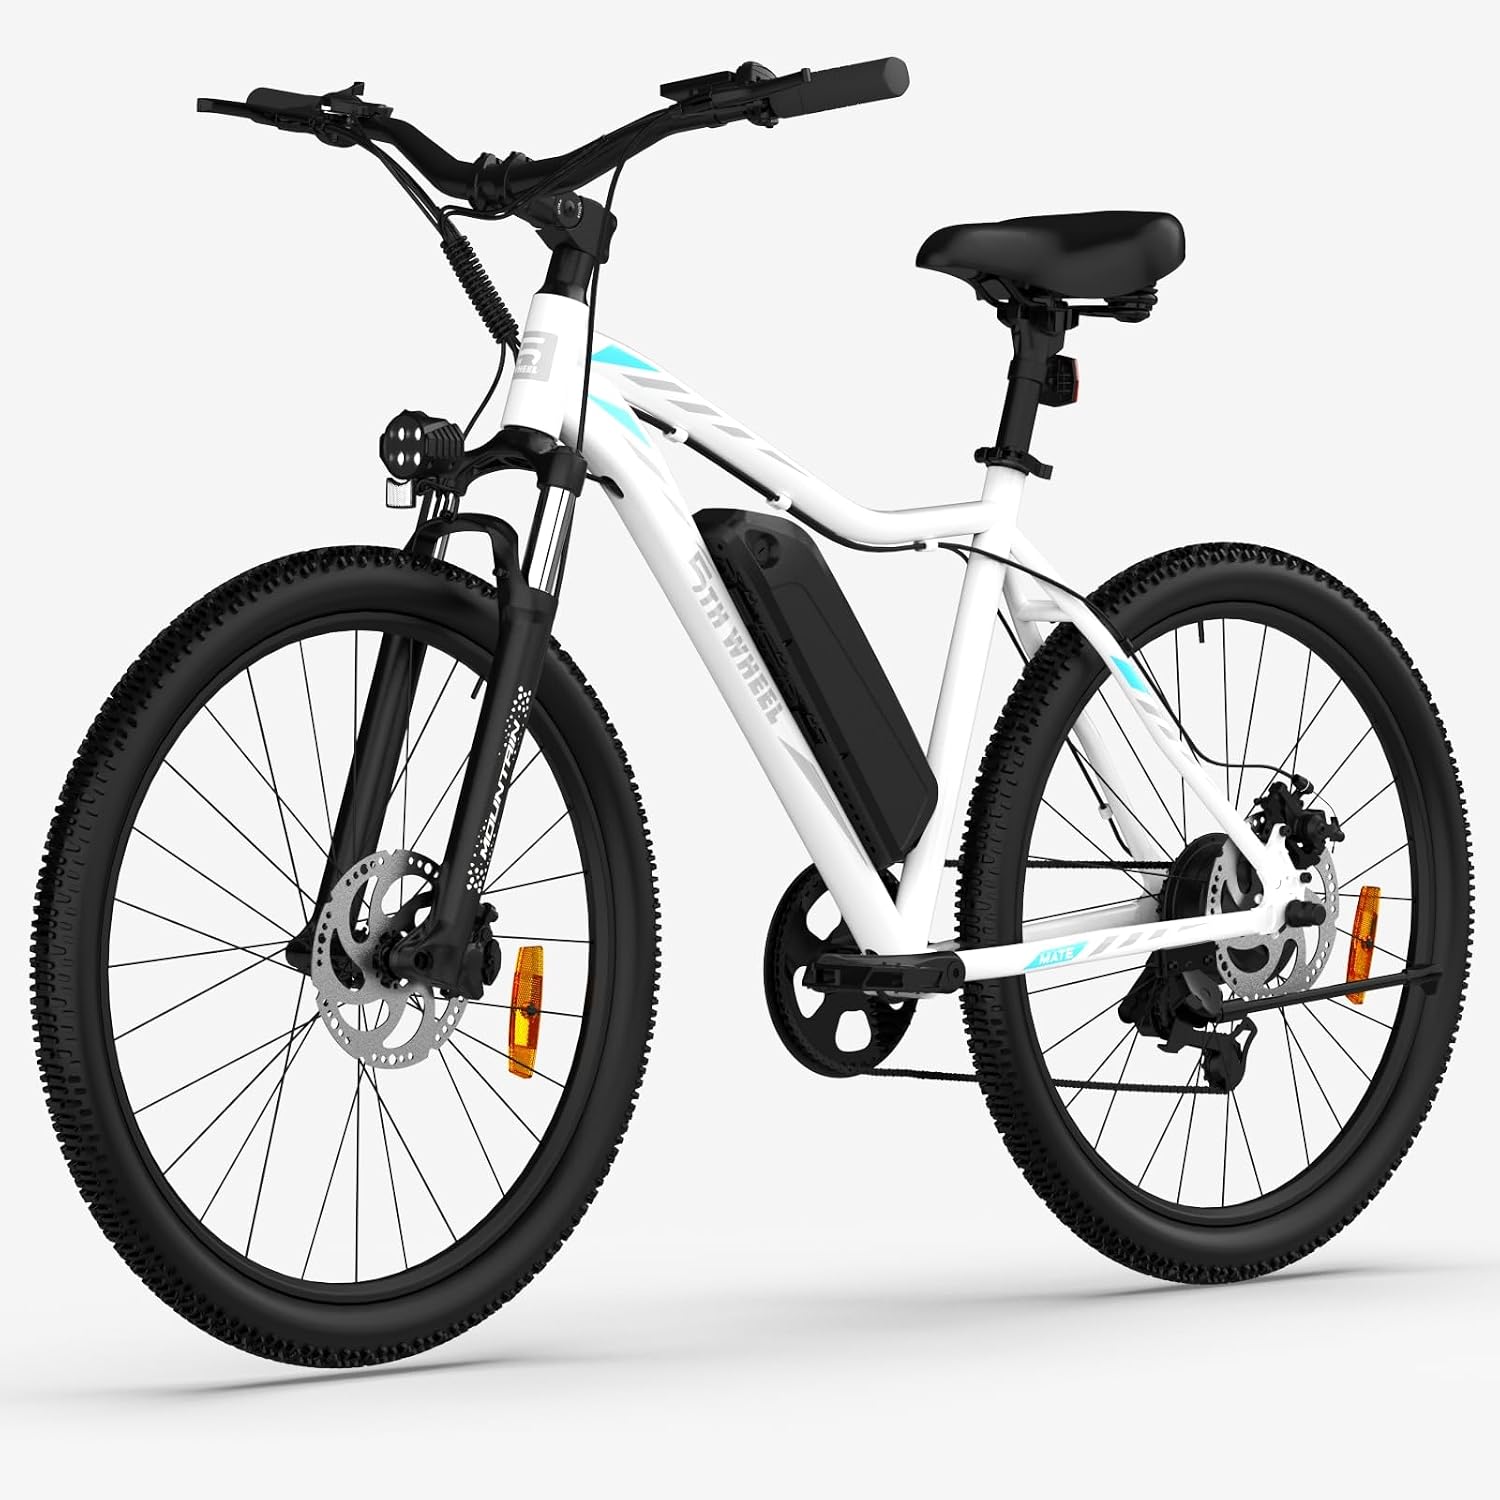
The full-size mixed-terrain pick: 5TH WHEEL Mate Electric Bike for Adults, 1000W Peak Motor, 26 inch Commuting & Mountain E-Bike
 Visit on Amazon →
This is the shape I recommend to someone with an 8 to 15 mile commute and a mix of pavement and gravel path. The spec sheet lists a 1000W peak motor, a 23 mph top speed, a 468WH removable battery, 26-inch wheels, a color LCD display, 7-speed gears, and an adjustable stem.
Three of those matter more than the rest. The removable battery means you can carry the pack upstairs and charge it indoors, which is better for both battery life and your peace of mind if you park in a hot garage. The adjustable stem gives you real room to dial in reach instead of buying a new stem. And the 26-inch wheels roll over rough pavement with less fuss than anything smaller.
Flaws but not dealbreakers: A 23 mph top speed is fast territory, so the brake bedding step below is not optional on this bike. It also means you should know your local rules before you ride it wide open on a shared path. And 468WH is a modest pack for a full-size bike, so if your round trip is long, plan your assist level rather than your throttle.
This is the bike for a rider with a real commute, a place to store a full-size bike, and an outlet near the door.
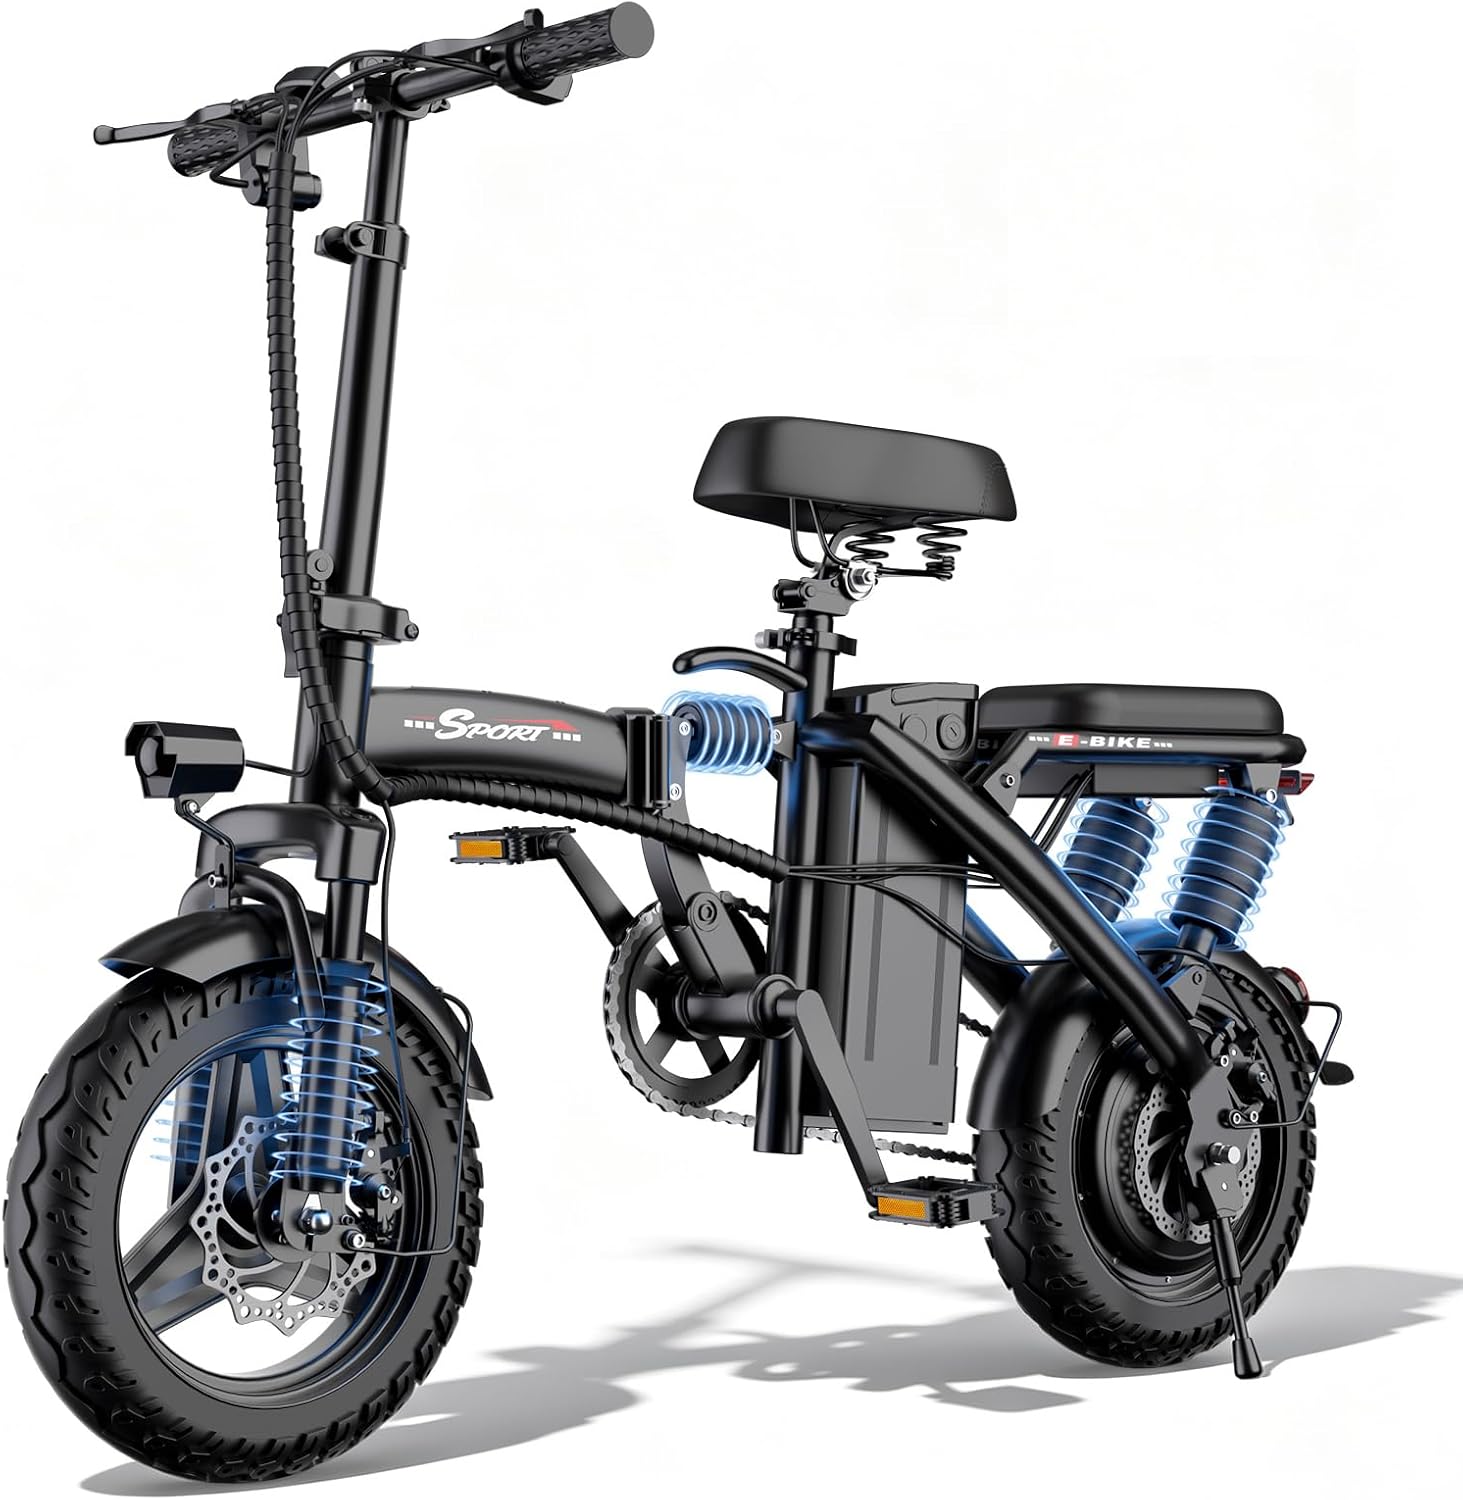
The small-space, mixed-mode pick: Electric Bike for Adults, 1200W Peak Motor Commuting E Bike, Foldable, 14 inch Tires
 Visit on Amazon →
The listing on this one reads like a spec sheet built for a train platform: 1200W peak motor, 22 or 25 mph depending on mode, 30 or 45 miles of pedal-assist range as claimed by the manufacturer, 6-point full suspension, a folding frame, and 14-inch tires.
Take the range claim the way I take every range claim, which is as a ceiling, not a promise. The suspension and the fold are the real story here. Six points of suspension on a 14-inch wheel is what keeps small-wheel riding from rattling your fillings loose, and the fold is what lets you take the bike into an apartment, an office, or onto a train without a rack.
Flaws but not dealbreakers: Small wheels carry less air volume, so tire pressure matters more here than on any full-size bike, and potholes hit harder no matter how good the suspension is. The folding hinge and handlebar latch also need a torque check on a regular schedule, because that latch is a safety part, not a convenience part.
This is the bike for a last-mile commuter, a small apartment, or anyone whose route includes a train.
The setup workflow, step by step
Now the part you came for. This order works on either bike above and on almost anything else with a motor and a battery.
Step one: charge it fully, then write down the number. The first charge is your baseline. Charge to 100 percent before the first ride, let the pack cool before you head out, and note the range you get. Every comparison you make for the next two years is measured against that first number.
Step two: torque every fastener before you ride a mile. Stem bolts, handlebar clamp, seatpost clamp, pedals, and axle nuts. On a folding bike, add the frame hinge and the handlebar latch to that list. New bikes settle in during the first 50 miles, so the first re-torque is not optional. Use a torque wrench if you own one. If you do not, a shop will run a safety check for the price of a coffee, and it is the best money you will spend on the bike.
Step three: set tire pressure for your weight, not for the number on the sidewall. Tire pressure is the cheapest suspension you own. Start at the sidewall pressure and tune from there: drop a little for rough pavement and comfort, add a little for loaded panniers and efficiency. On a 14-inch wheel the same pressure feels far harsher than it does on a 26-inch wheel, because there is much less air volume doing the work, so small-wheel bikes need more attention here, not less.
Step four: bed in the brakes. Find an empty parking lot. Ride at a moderate speed and brake firmly down to near walking pace, 10 to 15 times, without coming to a complete stop at the end of each one. That transfers an even layer of pad material onto the rotor. Skip it and the brakes will feel grabby and noisy for months, on a bike that weighs considerably more than a bicycle.
Step five: fit the bike to your body. Saddle height first. With your heel on the pedal at the bottom of the stroke, your leg should be close to straight. Then reach: the adjustable stem on the 5TH WHEEL Mate gives you room to raise or extend the bars, while a folding 14-inch bike sits more upright by design, so adjust the seat rather than fighting the geometry.
Step six: choose your assist level on purpose. Most commuters ride in the highest assist level all the time and then wonder why the range disappears. Pick the level you can hold for your entire commute and still arrive without needing a shower. That is your commuting level, and it is the only one that matters.
Step seven: run a real range test at three assist levels. Same loop, same rider, same day, three passes: low, middle, and your commuting level. Write down the distance and the battery percentage left after each pass. That gives you a number you can plan a week around, unlike the number printed on the box.
Step eight: treat the battery like the expensive chemistry it is. Charge it indoors, off the bike, whenever the pack is removable. Do not leave it parked at 100 percent for weeks at a time. Do not charge it in a hot garage. And confirm the pack and charger carry a recognized safety listing, because that is the line between a commuter and a fire risk.
Step nine: start a battery log. Date, charge cycles, range achieved. It takes ten seconds and it is the only way to catch a pack that is fading before it strands you. At the 500-mile mark, compare your current range against day one. A small drop is normal. A large one is a warranty conversation.
The pre-ride check you do every morning
Two minutes, every ride, in this order. Squeeze both brake levers and confirm they feel firm. Thumb-test both tires. Check the quick releases and axle nuts. On a folding bike, confirm the frame hinge and handlebar latch are fully seated and locked. Turn on the lights. Then press the battery into its mount and confirm it is locked in place.
That last one catches more problems than anything else on the list. A pack that is not fully seated will cut out under load, and riders blame the motor for a battery mount issue every single time.
What this costs
The setup itself is free. What it costs you is about 90 minutes on day one, plus a torque wrench if you want to do your own wrenching, plus the price of a shop safety check if you would rather not.
The things worth budgeting for beyond the bike are a helmet, a lock rated for the neighborhood you park in, and lights if the bike does not include them. Neither bike here needs a rack or a car carrier if you go with the folding model, which is part of why people pick it.
Both bikes sit in the budget tier, so check the current Amazon price on each before you decide, and compare that against what you would spend on a used bike plus a replacement battery. The battery is usually the deciding number.
The bottom line
A commuter e-bike is only as good as its weakest part, and the weakest part is almost never the motor. It is the setup. Torque the fasteners, bed the brakes, fit the bike, pick an assist level you can live with, and log the battery from day one.
Do that and you get a machine that shows up for you every morning for years. Skip it and you get a bike that feels like a project by month three. The 90 minutes is the whole difference.