A 20-inch fat tire e-bike is the most useful oddball in my shop. The wheels are small enough to fit in a trunk, the tires float over gravel and tree root, and the whole thing hangs on a wall in a way a full-size commuter never will. The question I get most often is whether to build one around a rear hub motor kit or just buy a complete bike and be done with it.
I have done both, many times, for customers and for myself. So here is how I think through a 20-inch fat tire e-bike build: what a motor kit actually asks of you, what the numbers on the box actually mean, and where the money really goes.
Why you should trust me
I have been a bike mechanic for 15 years and an e-bike commuter for seven. I have converted more bikes than most shops will touch, and I started writing about e-bikes after too many customers walked in with a mail-order bike that died inside a year. My rules are simple. No review without at least 100 miles on the bike. No range claim without a real three-level test. No "fireproof" talk, because a battery is chemistry, not marketing.
I have not logged 100 miles on either of the two products below, so this is not a ride report. It is the framework I use before I spend a dollar, applied to both options.
How I judged these two options
I read the spec sheets, ran the arithmetic, and asked the questions I ask every customer who walks in with a kit or a cart link.
The first number that matters is watt-hours. Watt-hours are the honest measure of a battery, because they combine voltage and capacity into one figure you can divide. A 48 volt, 249 watt-hour pack works out to roughly 5 amp-hours, which is a small battery by commuter standards. That is not automatically bad. It is light, it is removable, and on a short city hop it may be all you need.
The second number is consumption. A fat tire bike at 20 mph is thirsty. A reasonable planning figure is 20 to 30 watt-hours per mile with you pedaling, and more if you are heavy, climbing, or running throttle only. Divide your battery by that number and you get your real range. Do that math before you believe any range claim on any listing, including the ones I link here.
The third thing I check is brakes, because a motor makes a slow bike fast and does nothing for the parts that stop it. The fourth is parts. Standard axle nuts, standard rotors, standard tires, standard tubes. If a part is proprietary and the seller disappears, the bike becomes furniture.
The two paths to a 20-inch fat tire e-bike
There are exactly two sane routes. You buy a complete bike that already has the motor, the battery, the controller, and the lights sorted, or you buy a motor wheel and build the rest around a frame you already own. Everything else is a variation on those two.
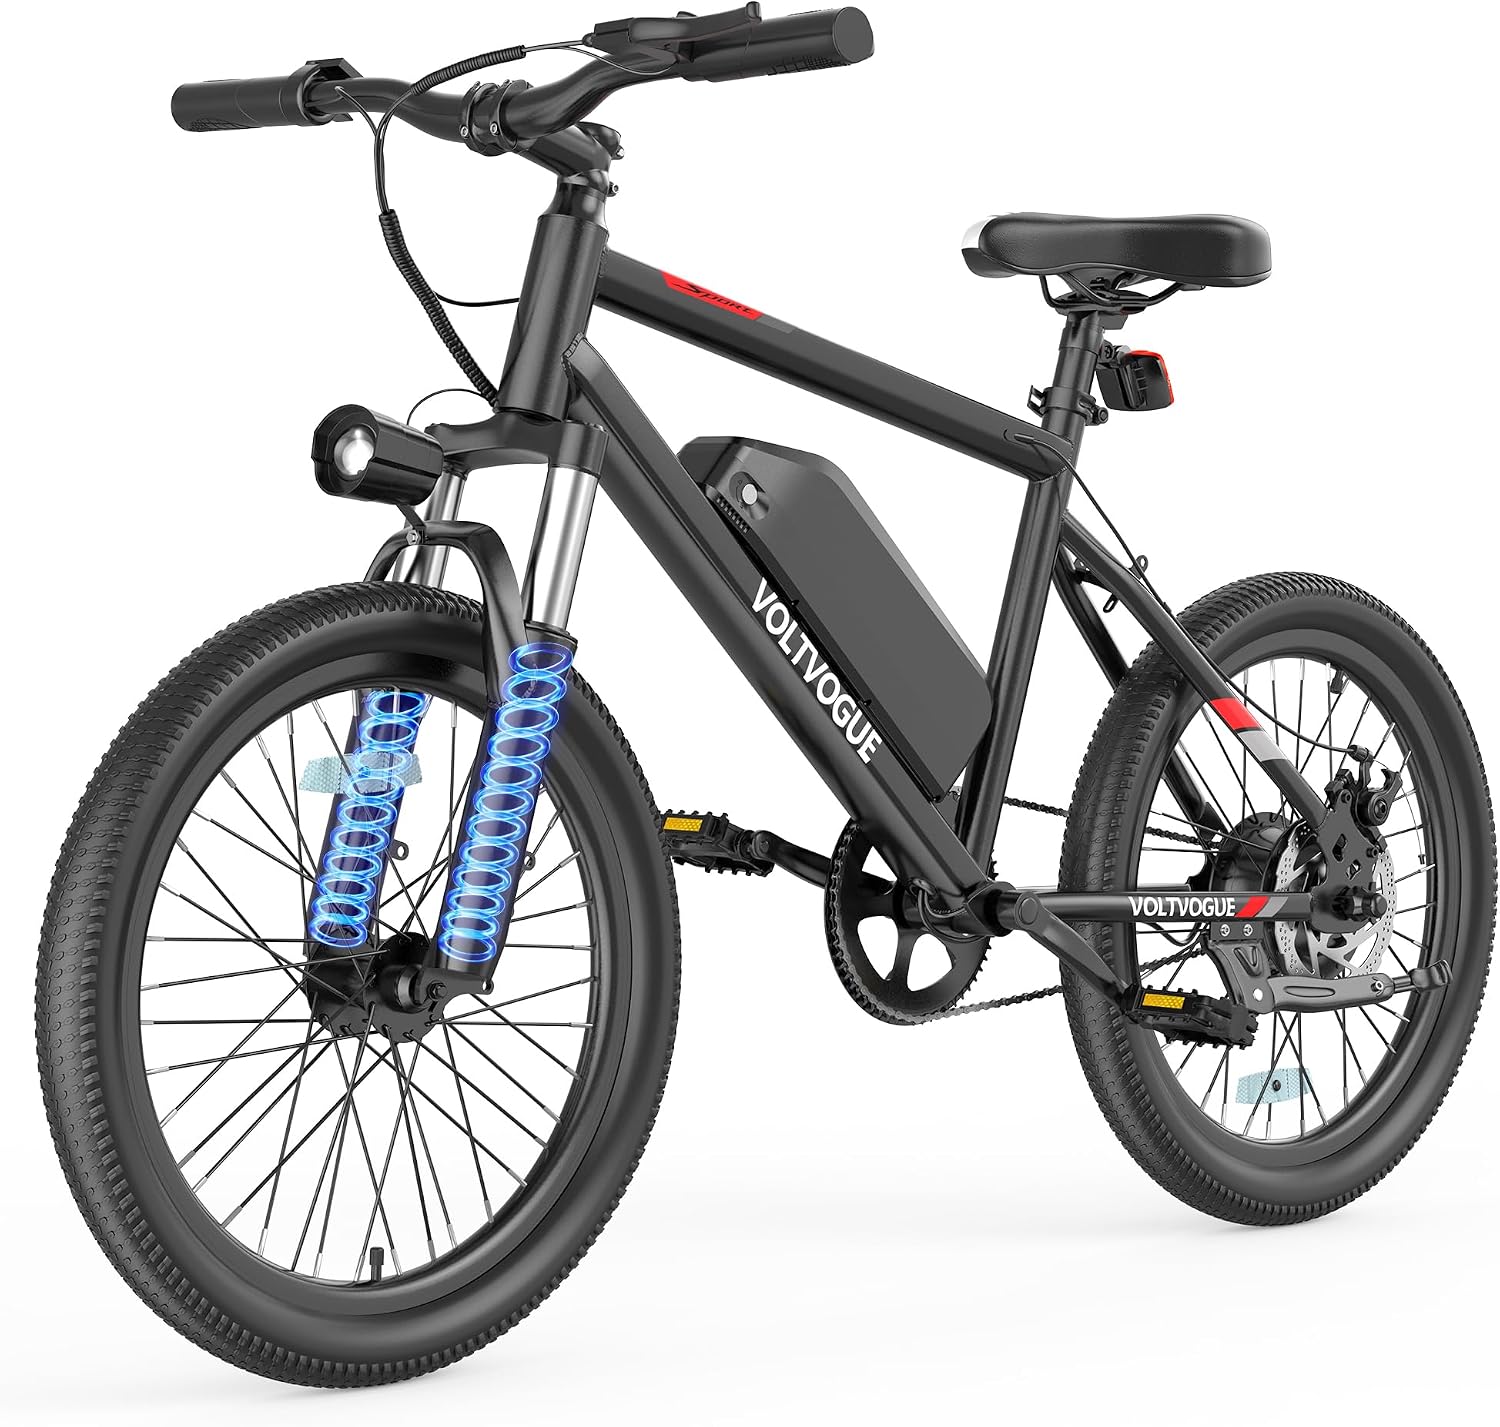
The turnkey option: Electric E-Bike | 48V 249 Wh Removable Battery | 1000W Peak Motor | 22 mph Top Speed | 30-45 Range | Front Shock Absorber | LED Headlights | 20Inch All-Terrain Fat Tires
 Visit on Amazon →
This is the whole bike in one box. A 48 volt, 249 watt-hour pack that comes out of the frame, a 1000W peak hub motor, a claimed 22 mph top speed, a claimed 30 to 45 mile range, front suspension, LED headlights, and 20-inch all-terrain fat tires.
The removable battery is the feature I care about most, and not for the reason people think. It matters because it lets you charge the pack indoors, in a room you are actually in, instead of running an extension cord to a cold garage. It also matters because when the pack finally fades, you replace a battery instead of a bike.
Three things to verify before you click. First, the brakes. Look at what the listing specifies and make sure it is a disc setup with enough rotor to stop a loaded bike, not a rim brake dressed up with a motor. Second, certification. Look for a UL 2849 mark on the bike or a UL 2271 mark on the battery, and if you cannot find it in the listing or the photos, ask the seller directly. Third, the size. Twenty inch wheels with four inch tires put the pedals low and the standover short, which suits a lot of riders and cramps others. Measure your inseam against the geometry before you order, not after.
On speed: 22 mph sits between a Class 1 bike and a Class 3 bike, so check your local rules and your local trails before you assume where you can ride it. In Texas, the class definitions are enforced unevenly but they exist, and a motor that will do 22 mph can get you removed from a shared path in some cities.
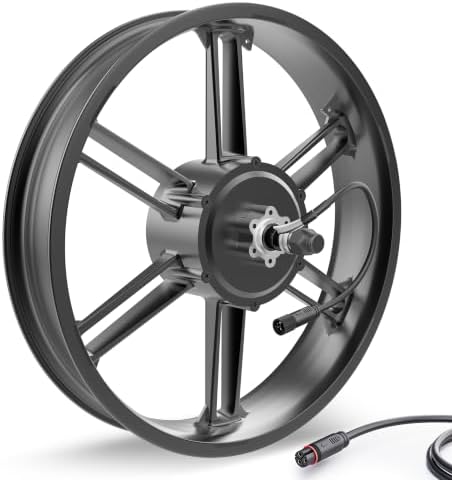
The conversion option: 20 x 4.0'' Fat Tire E-bike Rear Wheel, 48V 1000W Motor, Mag Wheels
 Visit on Amazon →
Read the name carefully, because it tells you exactly what you are buying. This is one rear wheel: a cast mag wheel sized for a 20 x 4.0 tire, with a 48 volt, 1000W hub motor built into the hub. It is not a bike. It is not a kit in the full sense either. There is no controller, no display, no throttle, no battery, and no front wheel in the box.
What this is good for is a donor frame you already trust. If you have a 20-inch fat bike with a rear dropout that matches, a frame that fits you, and brakes you believe in, this wheel is the expensive half of a conversion and you supply the rest. The mag wheel is a genuine plus on a small bike, because cast wheels do not need truing and they do not mind the side loads that a 20-inch wheel with a heavy motor takes.
What it is not good for is a frame you have not measured, or a build where you are hoping the parts talk to each other. A hub motor and a controller have to agree on voltage and on hall sensor wiring, and getting that wrong is how people end up with a bike that stutters or does not start. If you are not comfortable with a multimeter and a soldering iron, this is the harder path, not the cheaper one.
The build checklist, in order
This is the sequence I follow on any hub motor conversion. Skip a step and you will do it later, at a worse time.
Step one: Measure the dropout. Pull the rear wheel and measure the distance between the inside faces of the dropouts. A 20-inch fat frame is usually wide, but "usually" is not a measurement. If the new wheel does not drop in without force, stop. Never spread a frame with your hands and hope.
Step two: Match the axle and fit torque arms. A 1000W hub can spin an axle inside a stamped dropout on one hard launch. When the axle spins, the motor cable wraps around it and the wheel locks, usually at speed. Torque arms are cheap and they take ten minutes. Fit them on both sides if the frame allows.
Step three: Confirm the brakes. Check the rotor mount pattern on the new wheel against the rotor you own, and check that the caliper has clearance for the wider hub. This is the step people skip and then discover the rotor rubs the frame.
Step four: Pair the controller and display. The controller has to match the motor's voltage and its hall sensor connector. The display has to match the controller's protocol. Buy these as a matched set when you can, and label every connector before you unplug anything.
Step five: Mount the battery where it belongs. Voltage has to match the controller. Mounting matters just as much. A pack bolted to a rear rack on a 20-inch bike puts weight high and behind the axle, and the bike will handle like a shopping cart. In the triangle or on the downtube is better if the frame allows it.
Step six: Tires, tubes, and clearance. A 20 x 4.0 tire is not the same as a 20 x 4.0 rim, and fat tires vary in actual width by brand. Check clearance at the chainstays and at the fork crown before you inflate to pressure.
Step seven: First ride and re-torque. Ride a mile, gently, then check the axle nuts, the torque arms, the rotor bolts, and every cable tie. Re-check after the first ten miles. Hub motors settle into dropouts, and a nut that was tight on day one is often loose on day three.
What the numbers on the box actually mean
"1000W" on a hub motor is almost always a peak figure, not a continuous one. Peak is what the motor can pull for a few seconds on a climb. Continuous is what it can survive for an hour. The continuous rating is usually about half the peak number, and that is the number that determines whether the motor gets hot on your commute.
"30 to 45 range" is a marketing span, and it is not a lie so much as a best case. The top of that span assumes a light rider, flat ground, low assist, and full pedaling. The bottom assumes more of everything. Your number lives somewhere in the middle, and the only way to find it is to ride your actual route at your actual assist level and log it.
The arithmetic is the useful part. Take the watt-hours, divide by your realistic consumption per mile, and you have a range you can plan around. Then subtract a third, because you never want to arrive on empty and you never want to climb the last hill on a dead pack.
Battery safety, because this is the part that burns
I have said before that cheap e-bikes scare me, and I stand by it. The difference between a bike I would ride and one I would not is rarely the price. It is the battery, the brakes, and whether anyone stands behind the thing.
Look for UL 2849 on the complete bike or UL 2271 on the battery. If you cannot confirm a certification mark, treat that as a dealbreaker, not a negotiation. Charge while you are awake and in the room, not overnight in a hallway. Store the pack around half charge if the bike sits for months. Do not leave a fully charged battery in a hot garage through an Austin summer, because heat and full charge are what age a pack fastest. And do not buy a replacement charger from a stranger to save a few dollars. The charger is part of the safety system.
What this all costs
I am not going to quote prices here, because they move and I would rather you look. Check current Amazon price on both listings before you decide.
The structure of the cost is what matters. The complete bike is one purchase: motor, battery, controller, lights, tires, and a frame that was designed around all of it. The rear wheel is one component of a build, and a build also needs a controller, a display, a throttle or pedal sensor, a battery, a charger, mounting hardware, and possibly a front wheel to match. Add the donor frame if you do not already own one and the conversion is not obviously the cheaper route. It is the more interesting route, which is a different thing.
What I would not do
I would not put a 1000W hub on a frame with rim brakes. I would not drill a dropout to make an axle fit. I would not run an uncertified battery to save money, and I would not trust a range claim from anyone, including me, without doing the watt-hour math. I would not convert a frame I did not already love, because the frame is the part you cannot upgrade later.
The 20-inch fat tire e-bike is a great platform. Small wheels are strong, fat tires are forgiving, and a removable battery makes the whole thing practical for an apartment or a car trunk. Pick your route, do the arithmetic, check the certification, and fit the torque arms. That is the job.